We will create a Virtual Machine in Azure using the Ubuntu Operating System.
Let's see the step by step implementation,
Steps
- Create ASP.NET Core Web API Application
- Publish Web API Application
- Create Virtual Machine in Azure
- Install .NET Core and Apache in Virtual Machine
- Host Web API Application in Virtual Machine
Create ASP.NET Web API Application
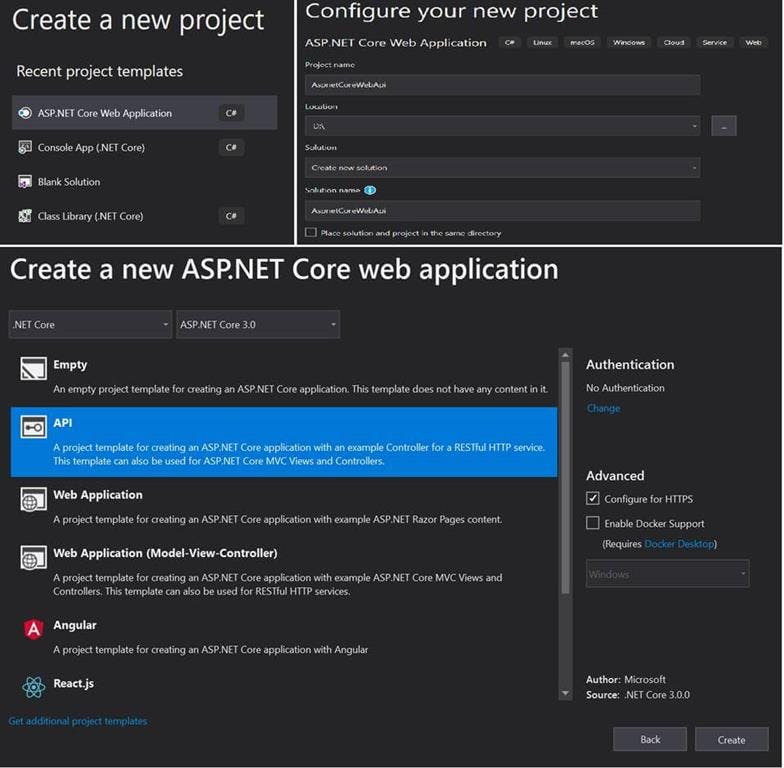
Create new project, select API as template and click on create button, which will create web API application with WeatherForcast Controller having get method.
Configure Swagger in AspnetCoreWebApi, so that we can see exposed method in UI.
In order to enable swagger, add the below nuget packages
- AspNetCore
- AspNetCore.Swagger
Add the below code in startup.cs under ConfigureServices method
services.AddSwaggerGen(c =>
            {
                c.SwaggerDoc("v1", new Microsoft.OpenApi.Models.OpenApiInfo { Title = "Aspnet Core Web Api", Version = "v1" });
                var xmlFile = $"{Assembly.GetExecutingAssembly().GetName().Name}.xml";
                var xmlPath = Path.Combine(AppContext.BaseDirectory, xmlFile);
                c.IncludeXmlComments(xmlPath);
            });
Add the below code in startup.cs under Configure method
app.UseSwagger();
           app.UseSwaggerUI(c =>
           {
               c.SwaggerEndpoint("/swagger/v1/swagger.json", "Aspnet Core Web Api");
               c.InjectJavascript("/swagger/custom.js");

           });
Create AspnetCoreWebApi.xml file with the below content:
<?xml version="1.0"?>
<doc>
</doc>
Copy AspnetCoreWebApi.xml to D:\AspnetCoreWebApi\AspnetCoreWebApi\bin\Debug\netcoreapp3.0
Now run the application and see the result in UI.
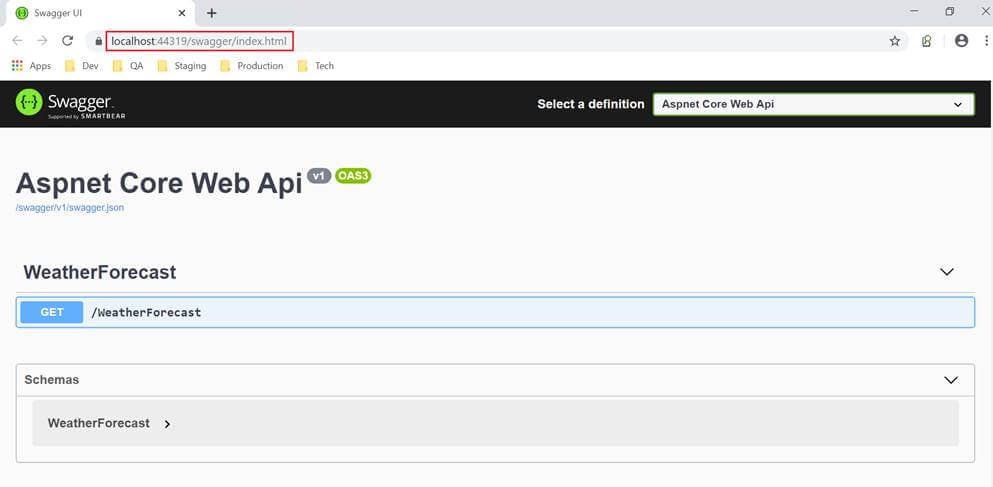
Our application is running under localhost in our system.
Publish Web API Application
Right click on project and click on Publish
Click on Folder from left panel and select the path where you would like to save publish copy
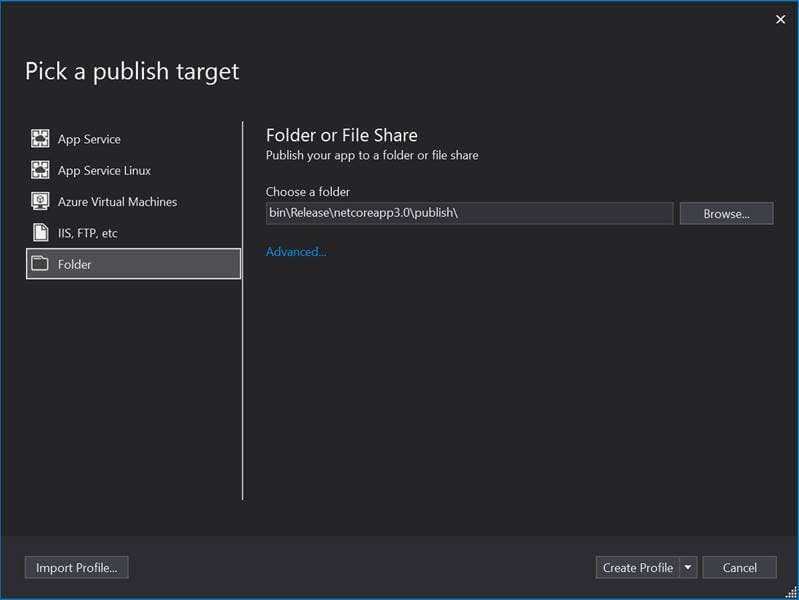
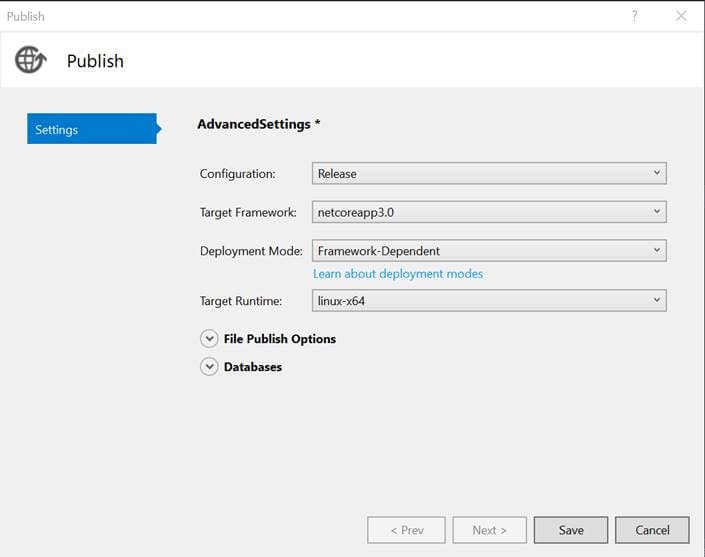
Click on Advanced link, which will open below window
Select Release as Configuration, netcoreapp3.0 as Target Framework and Framework-Dependent as Deployment Mode
Select linux-x64 as Target Runtime, as we want to host our application in Linux environment
Click on Save button
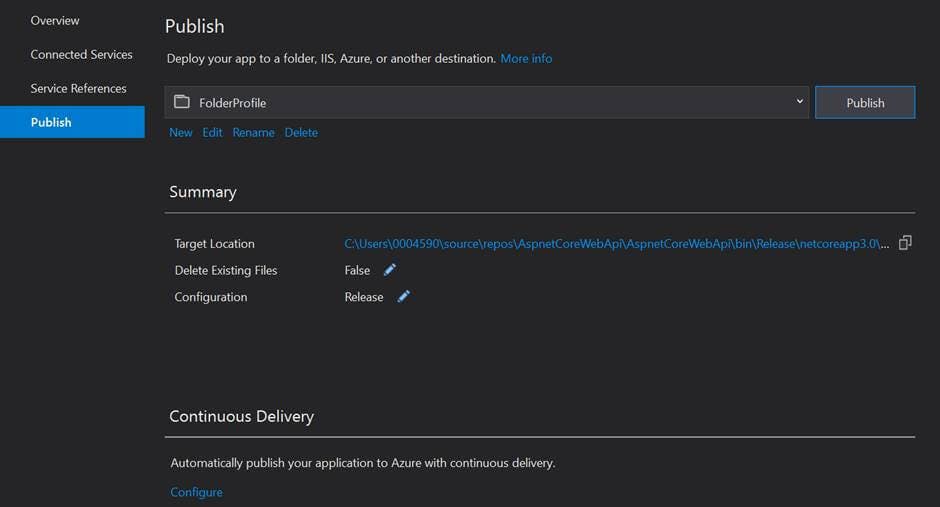
Click on CreateProfile which will create a profile for us and will be useful for further releases
Click on Publish button which will publish our application and save in predefined path
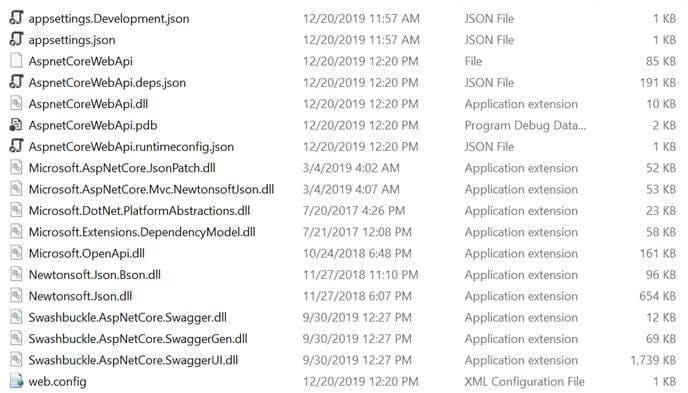
Explore our selected path i.e. D:\AspnetCoreWebApi\AspnetCoreWebApi\bin\Release\netcoreapp3.0\publish and we can see the published data
Create Virtual Machine in Azure
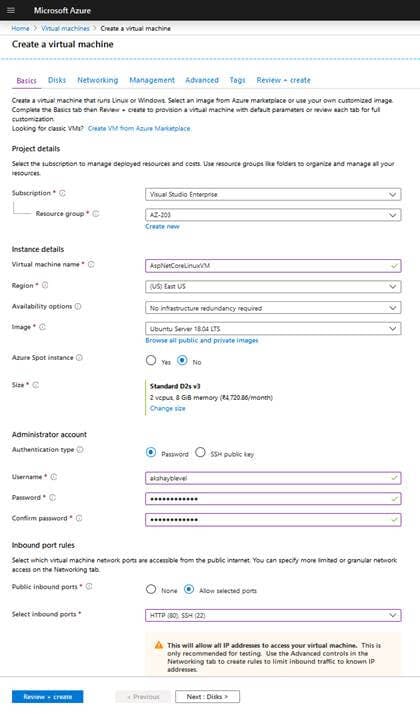
Log into portal.azure.com and click on "Virtual machines".
Click on 'Add', which will open the "Create a virtual machine" wizard.

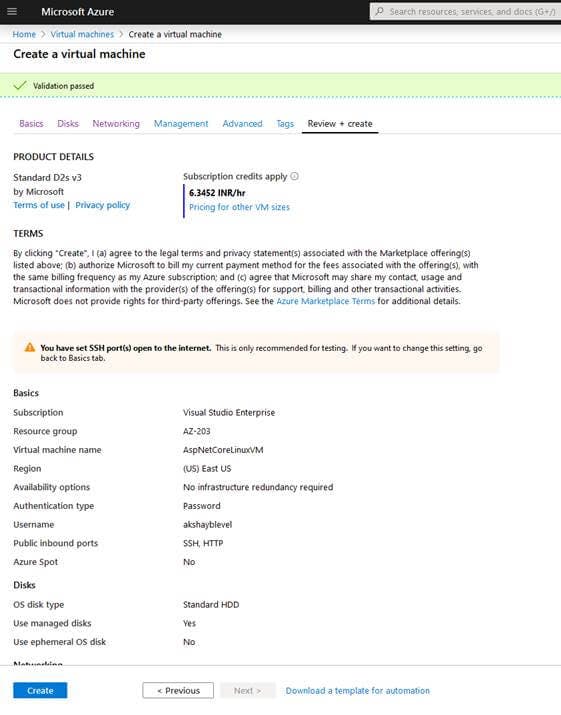
- Select your Azure subscription. Duly note that all resources in an Azure subscription are billed together.
- Select existing or create a new resource group. It is a collection of resources that share the same lifecycle, permissions, and policies.
- Provide your virtual machine a name. For demo purpose, I have given it a name like 'AspNetCoreLinuxVM'.
- Select the region that is right for you and your customers. Not all VM sizes are available in all regions.
- Azure offers a range of options for managing the availability and resiliency of your application. We can select 'Availability Set' also but as of now, select 'No infrastructure redundancy required'.
- Choose the base operating system or application for your VM.
- Change the size as per your requirement and the price will be calculated accordingly.
- Provide Username and Password which will be used later on to connect your VM.
- Select SSH and HTTP as inbound ports
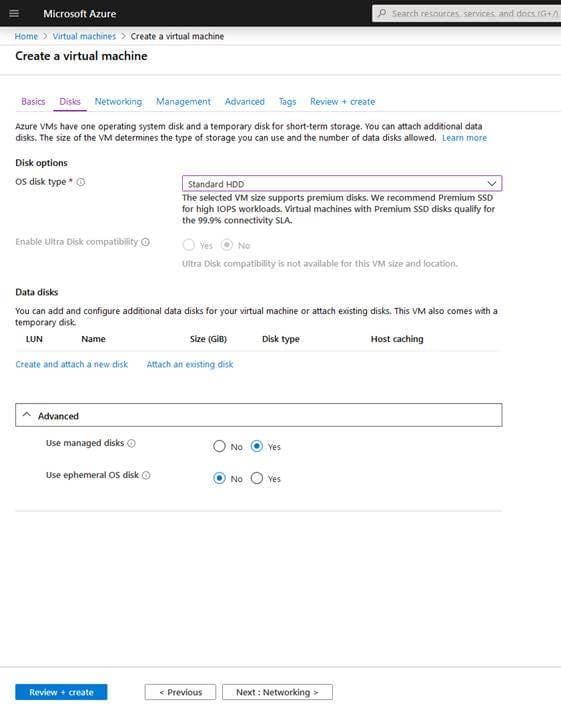
Select your disk option.
Premium SSD Offers high-performance, low-latency disk support for I/O-intensive applications and production workloads.
Standard SSD Cost effective storage option optimized for workloads that needs consistent performance at lower IOPS (Input/Output Operations Per Second) levels.
Standard HDD For dev/test scenarios and less critical workloads at the lowest cost.
For best performance, reliability, scalability, and access control, it is recommended to select Managed Disk for most of the virtual machine configuration. Use unmanaged disks if you need to support certain classic scenarios or want to manage Disk VHDs in your own storage account.
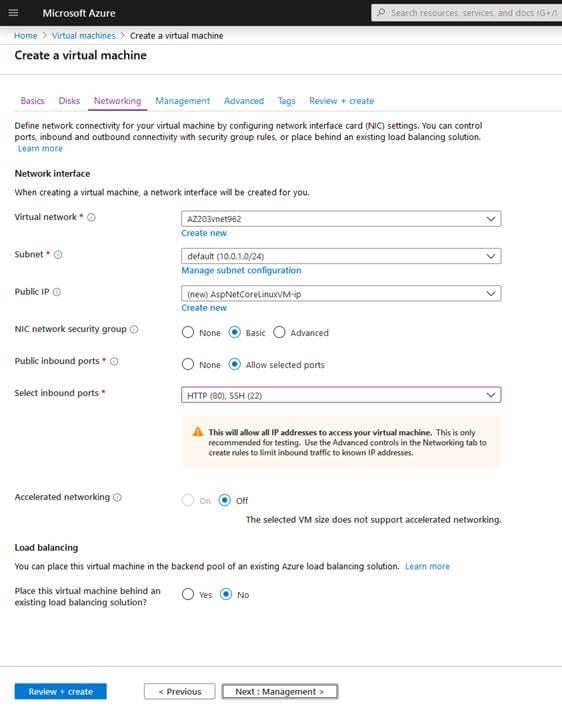
Keep the networking option as it is and move to Management.
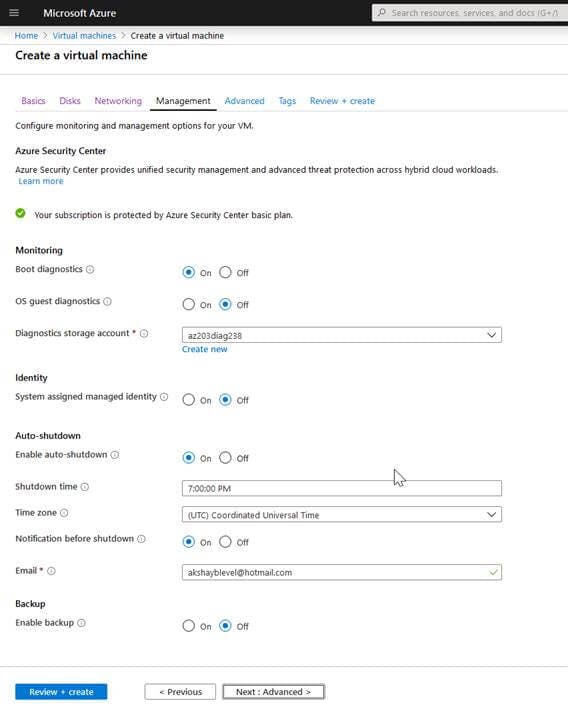
Boot the diagnostics capture serial console output and screenshots of the virtual machine running on a host to help diagnose startup issues.
OS guest diagnostics gets metrics every minute for our virtual machine. We can use them to create alerts and stay informed on our applications.
Metrics are written on a storage account.
If Identity is enabled, all necessary permissions can be granted via Azure Role-based access control.
Enable auto-shutdown configures our virtual machine to automatically shut down daily.
Provide the time when we want to shutdown VM
Provide the time zone in which shutdown time is given
Subscribe for notification before the VM is shutdown
To guard our VM against accidental deletion and corruption, enable backup.
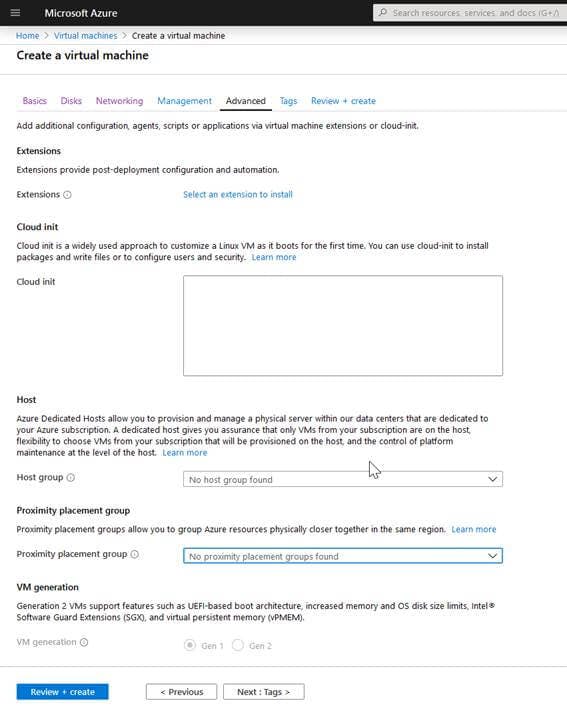
Keep Advanced option as it is and move to the Tags
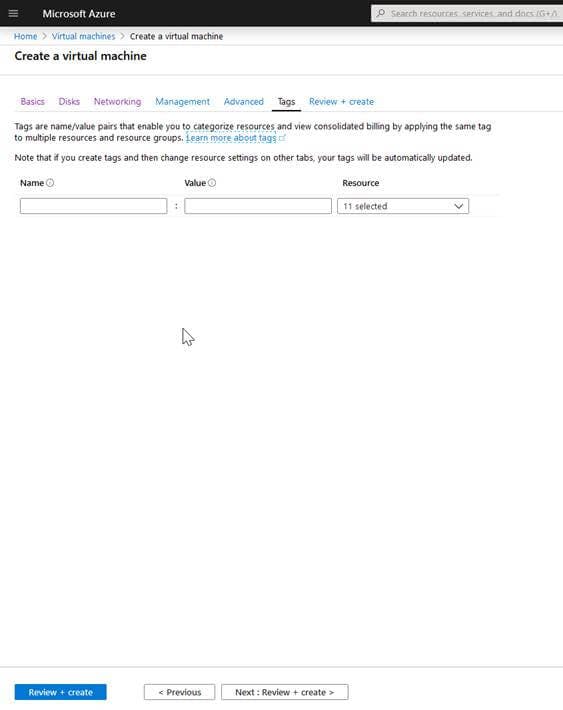
A tag is not required as of now. Skip this stage and move to Review + Create.
It will validate all the inputs and show the status message.
Click on the 'Create' button.
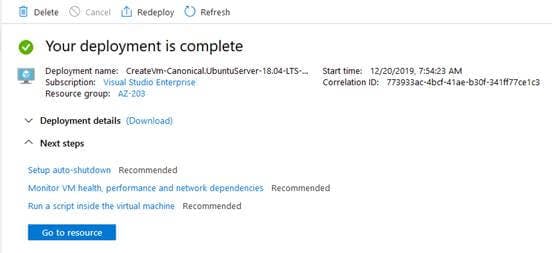
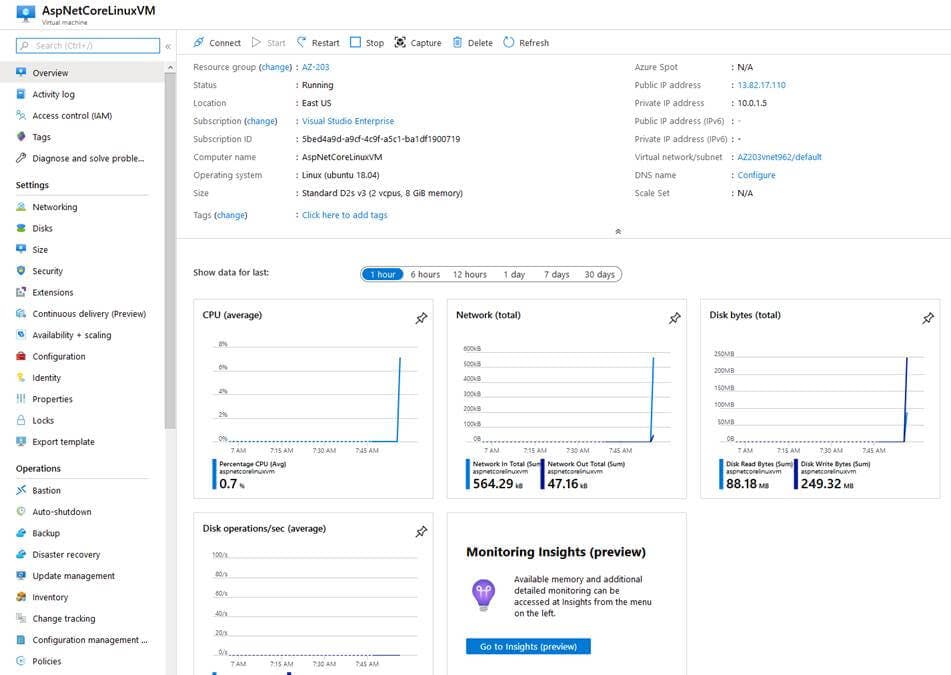
Once the VM is created, you will be able to see the deployment details as below.
Now, in the next step, let's try to connect our recently created VM. For this, we need a public IP Address and port.
Install .NET Core and Apache in Virtual Machine
Open command prompt to connect virtual machine
Execute below command with username and IpAddress
>ssh akshayblevel@13.82.17.110
It will ask for the password
>akshayblevel@13.82.17.110's password:xxxxxxxxxx
Once it is connected, execute below command to point to the root
>akshayblevel@AspNetCoreLinuxVM:~$ sudo -i root@AspNetCoreLinuxVM:~#
Execute below commands to register microsoftkey, product repository and required dependencies. Need to execute once per machine.
>wget -q packages.microsoft.com/config/ubuntu/18.04/.. -O packages-microsoft-prod.deb
>sudo dpkg -i packages-microsoft-prod.deb
Execute below commands in sequence in order to install .Net Core SDK,
>sudo add-apt-repository universe
>sudo apt-get update
>sudo apt-get install apt-transport-https
>sudo apt-get update
>sudo apt-get install dotnet-sdk-3.1
Install Asp.Net Core runtime
>sudo apt-get install aspnetcore-runtime-3.1
Install .Net Core runtime
>sudo apt-get install dotnet-runtime-3.1
In order to expose our application to the internet, we need IIS, Nginx or Apache as reverse proxy server that will accept HTTP request and forwards to Kestrel.
Execute below command to install Apache
>sudo apt-get install apache2
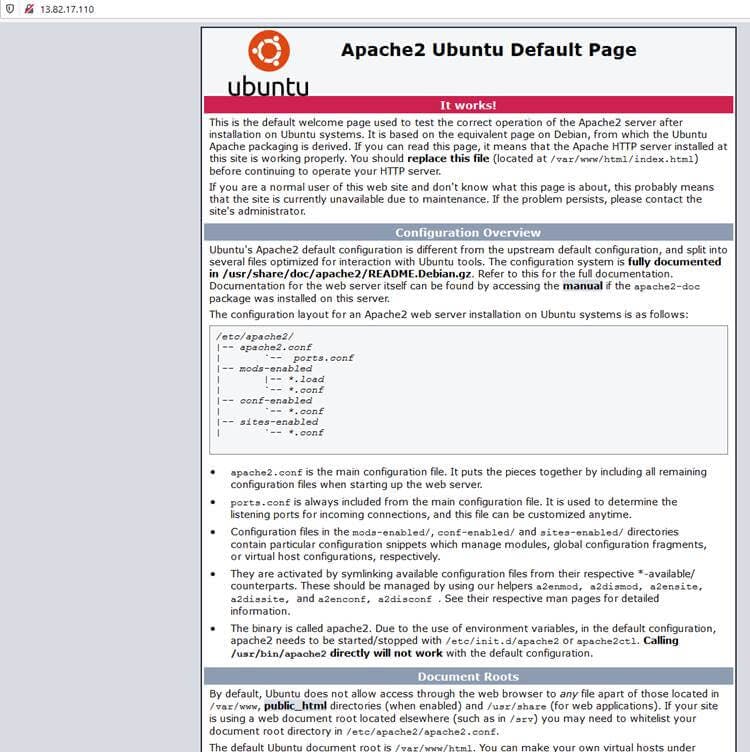
Copy public ip and run in the browser, if apache is installed correctly then you can see the apache default page
Enable modproxy modules in Apache server to make it work as a reverse proxy.
First we need to restart apache
>systemctl restart apache2
Enable modproxy module
>a2enmod proxy proxy_http proxy_html
Host Web API Application in Virtual Machine
All the configuration files in Apache are stored at /etc/apache2/conf-enabled directory. We need to create .conf file for our application.
Execute below command to create conf file
>vi /etc/apache2/conf-enabled/aspnetcorewebapi.conf
Insert below text to add in the aspnetcorewebapi.conf
<VirtualHost *:80>
   ProxyPreserveHost On
   ProxyPass / http://127.0.0.1:5000/
   ProxyPassReverse / http://127.0.0.1:5000/
   ErrorLog /var/log/apache2/aspnetcorewebapi-error.log
   CustomLog /var/log/apache2/aspnetcodewebapi-access.log common
</VirtualHost>
Execute below command to save the file and return back to root
>:x
Let's verify whether file is saved correctly or not by executing below command
>cat /etc/apache2/conf-enabled/aspnetcorewebapi.conf
Restart apache
>systemctl restart apache2
Create directory where we can transfer our published files.
Go to var directory
cd /var/
Create WebApi directory
mkdir WebApi
Go inside WebApi directory
cd WebApi
Now we need to transfer our published files to WebApi directory on server, for that we can use filezilla or winscp software.
Install winscp from below link
Connect to server using publicip, username and password. Once it is connected we can see the folder with name as username.
Drag and drop Publish folder from left panel to right panel i.e. on server
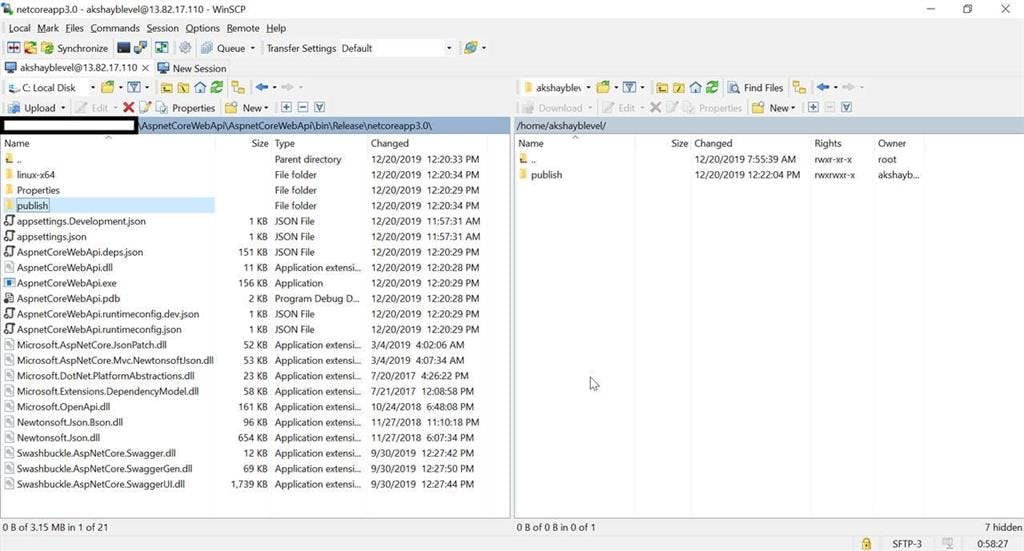
Explore publish folder from the right side and verify all the files are uploaded correctly.
Upload Transfer files including .xml into the same folder in order to support swagger.
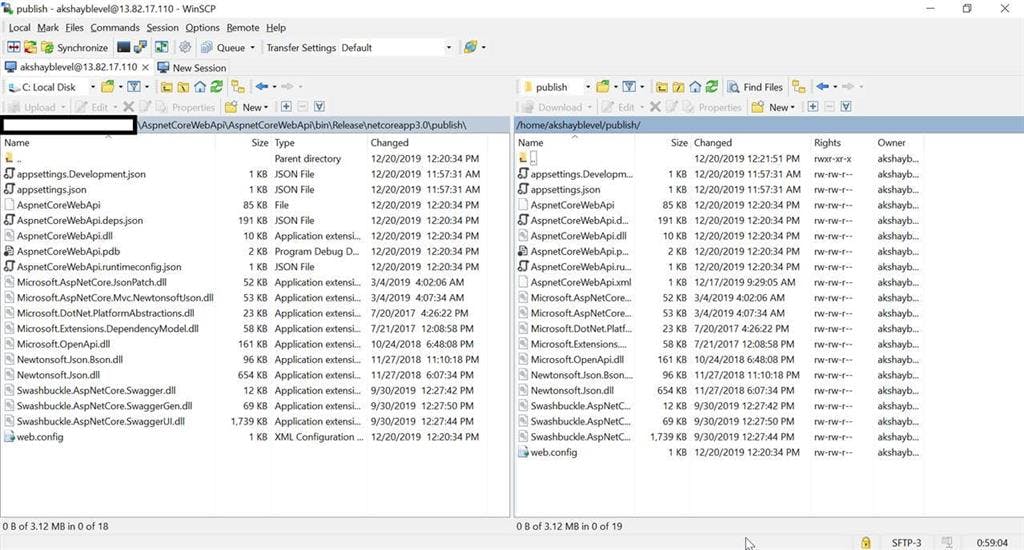
Now all the files are uploaded on server, in the next step we need to move files from akshayblevel directory to WebApi Directory.
Go to the akshayblevel directory
>cd /home/akshayblevel
Verify if publish folder is there or not.
>Ls
Go inside publish folder.
>cd publish
Verify if all the files are there or not.
>Ls
Copy all the files from publish folder to WebApi folder.
>cp -R /var/WebApi/*
Go to WebApi folder.
>cd /var/WebApi
Verify if all the files are there or not.
>Ls
Restart apache service and server.
systemctl restart apache2
sudo service apache2 restart
Create service file to start and monitor web app.
>vi /etc/systemd/system/kestrel-aspnetcorewebapi.service
Add the below content to the above service file, we need to provide working directory and which file should be executed.
[Unit]
Description=Aspnet Core Web Api running on Ubuntu 18.04
[Service]
WorkingDirectory=/var/WebApi
ExecStart=/usr/bin/dotnet /var/WebApi/aspnetcorewebapi.dll
Restart=always
RestartSec=10
SyslogIdentifier=dotnet-demo
User=www-data
Environment=ASPNETCORE_ENVIRONMENT=Production
[Install]
WantedBy=multi-user.target
Execute the below command to save the file and return back to root.
>:x
Enable and start recently created service.
sudo systemctl enable kestrel-aspnetcorewebapi.service
sudo systemctl start kestrel-aspnetcorewebapi.service
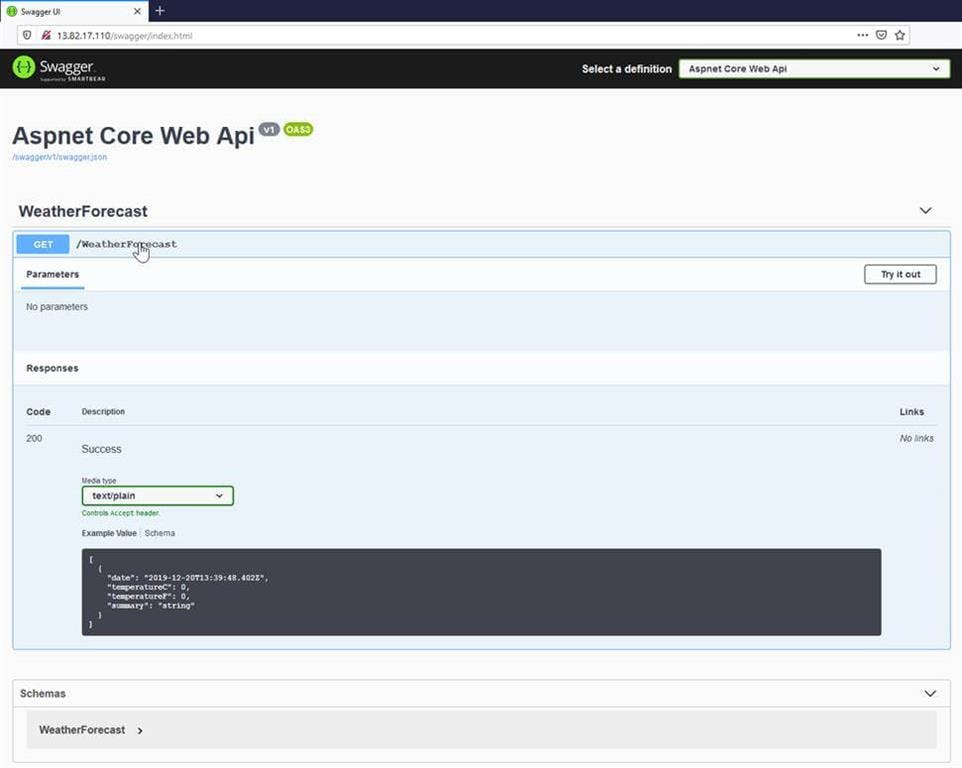
Now hosting is done, let's verify in the browser using public ip and we can see that our Asp.Net Core Web Application is successfully running in Linux environment.
